There’s no dedicated option for changing network profile names in either Windows Settings or the Control Panel. However, there are two ways to do it directly in Windows. We’ll also show you a free tool that makes the process even easier.
Foundry
Change the network name using the Registry Editor
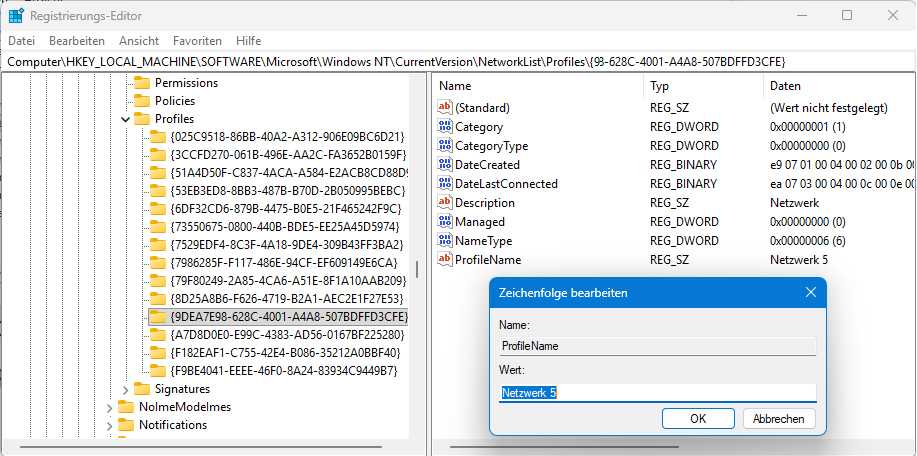
Click the search box on the taskbar, type regedit, and click Registry Editor. Then navigate to:
HKEY_LOCAL_MACHINE\SOFTWARE\Microsoft\WindowsNT\CurrentVersion\NetworkList\Profiles
Here, you’ll see a list of subfolders with names made up of two curly brackets and cryptic strings of letters and numbers. Each subfolder represents a current or former network profile. Windows keeps a record of every network profile that has been created on the computer.
Click each profile. In the right-hand pane of the Registry Editor, you’ll see information about the selected profile. At the bottom, look for ProfileName.
Look for the network profile you want to rename and double-click ProfileName. In the window that appears, enter the new name, click OK, and restart Windows.